
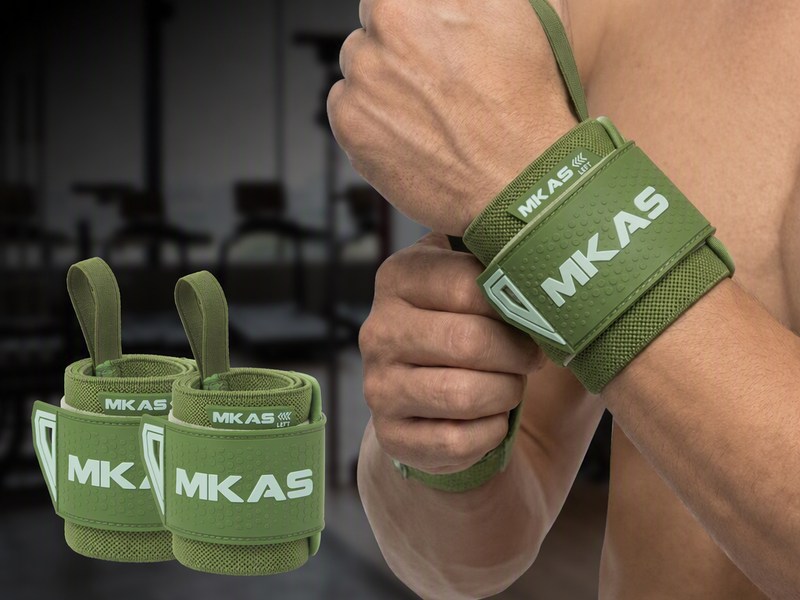
Most wrist wrap tutorials stop at “wrap it around your wrist and pull it tight.” That advice is not wrong — it is just incomplete. After years of building wrist wraps for strength brands and reading their return feedback, we see the same three questions behind almost every complaint: where exactly should the wrap sit, how tight is tight enough, and what do you do with the thumb loop?
This guide answers all three from the factory floor up. If you lift, it tells you how to position, tension and secure your wraps for each movement. If you develop or sell wrist wraps, those same three questions are what your reviews and returns are already telling you — and the last two sections turn them into material, length and stitching decisions.
What Are Wrist Wraps and What Do They Actually Do?
Wrist wraps are elastic bands that circle the wrist joint and fasten with a hook-and-loop closure. Their job is narrow but important: they stabilize the wrist joint so it stays stacked under the bar, limit the excessive extension that makes the wrist fold backward under load, improve force transfer from forearm to bar, and reduce unnecessary wrist strain during heavy pressing.
What they do not do is help you hold onto anything. Wrist wraps are not a grip aid. If your hands give out before your wrists do, the tool you need is a lifting strap — the difference is explained further down, and it is the single most common product mismatch we see in customer reviews.
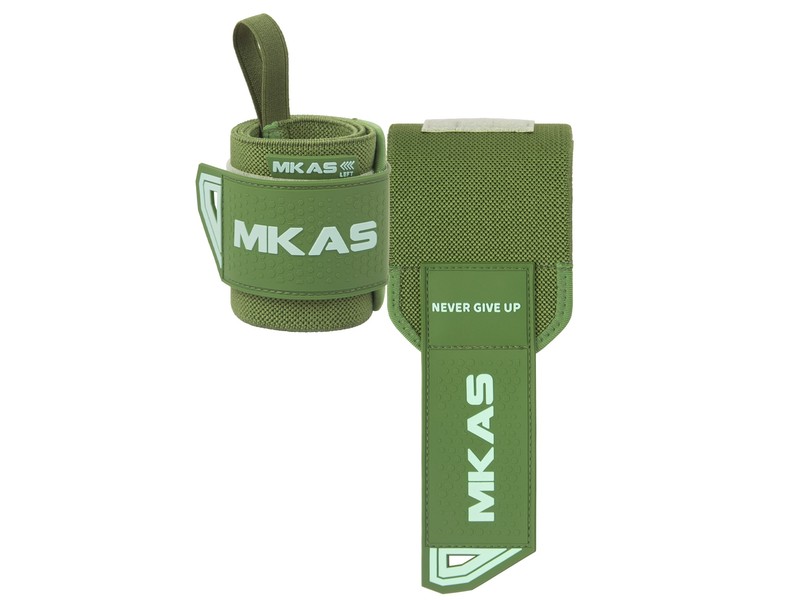
How to Wear Wrist Wraps Correctly
Position, wrapping technique, tightness, mobility and the thumb loop are not five separate topics. They are five decisions inside one question, and each one changes with the lift you are about to do.htly onto the heel of the palm. It should not sit entirely on the forearm.
Where Should the Wrist Wrap Sit?
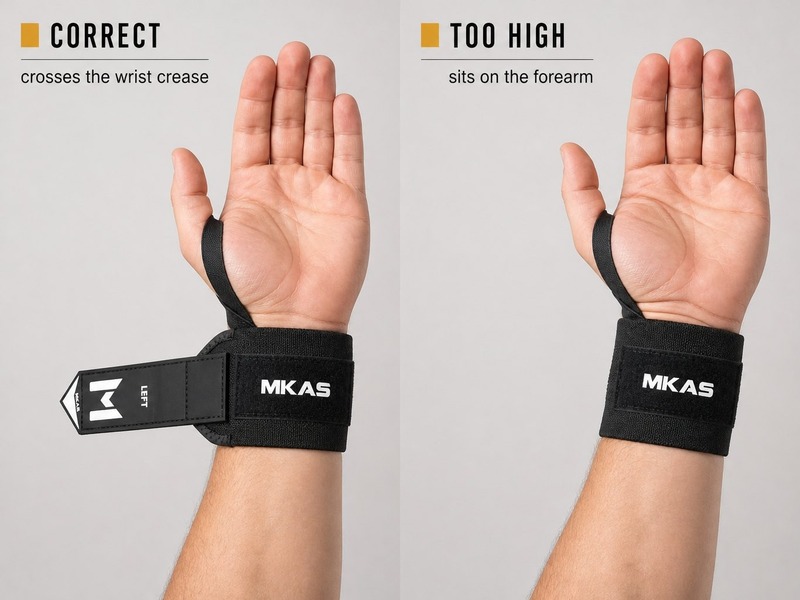
The wrist crease is the reference point — not the forearm.
The wrap should cover the wrist crease and overlap slightly onto the heel of the palm. It should not sit entirely on the forearm. Wrist extension happens at the joint, not above it, so a wrap placed high on the forearm applies its resistance where nothing is bending: the wrist can still fold backward while the wrap itself feels extremely tight. That single placement error is the most common reason lifters say their wraps “feel useless.”
Downward coverage has a limit too. The lower edge should cross the crease and cover a small part of the palm heel, but it should never reach the metacarpals or the main gripping area, where it starts to interfere with bar contact instead of supporting the joint.
How to Put Wrist Wraps On, Step by Step
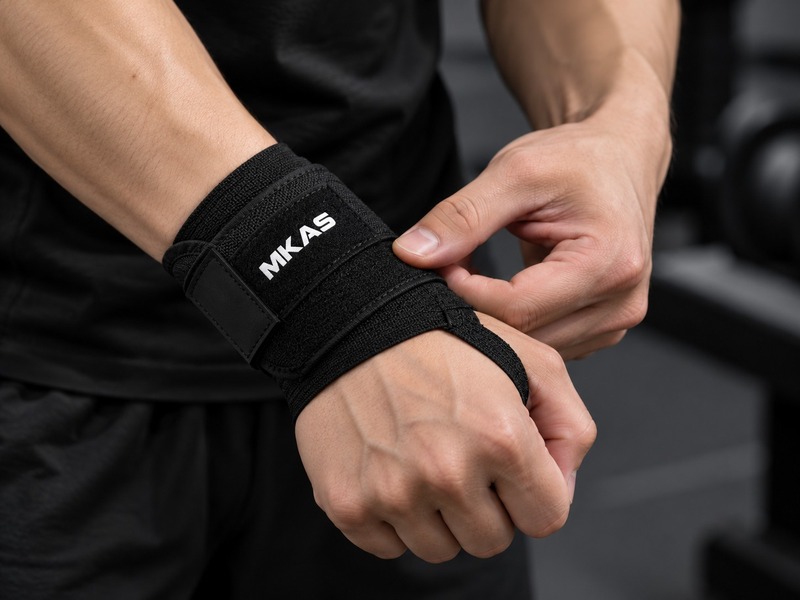
- Find the wrist crease. Flex your hand toward you and locate the fold line. That line is your anchor, not the forearm.
- Use the thumb loop to anchor the wrap. Slide your thumb through the loop so it holds the first turn in place while your other hand is busy.
- Wrap across the wrist joint. Every turn should pass over the crease, building support directly on the joint rather than above it.
- Maintain even tension. Pull with consistent force on each turn. Uneven tension creates a pressure ridge that digs in and a loose zone that supports nothing.
- Secure the closure. Press the hook-and-loop down firmly along its full length, then run the checks below before you load the bar.
How Tight Should Wrist Wraps Be?
“Snug but not too tight” is technically correct and practically useless. Three checks make it concrete. First, mobility: your wrist should still move slightly, but you should not be able to fold it backward easily. Second, circulation: numbness, tingling, swelling or pale fingers mean you are past the useful range, because sustained pressure at the wrist loads the same narrow passage involved in median nerve compression at the wrist. Third, the one-finger check: you should be able to slide roughly one finger under the edge — two fingers is usually too loose, zero is usually too tight.
Tightness is also not a fixed setting. The heavier and more static the press, the more restriction you can use; the more dynamic the movement, the more mobility you need to keep. A bench-press tension carried into a snatch will cost you the catch position.
Should Wrist Wraps Completely Lock Your Wrist?
Many lifters assume stiffer, tighter and fully immobile equals better. It does not. Support and rigidity are different things: wraps are meant to limit excessive movement, not eliminate all movement.
When the wrist is fully locked, compensation tends to appear at the elbow or shoulder, rotation needed for an overhead lockout disappears, stress transfers somewhere else instead of vanishing, and dynamic lifts become both uncomfortable and technically worse. Choose the level of restriction the lift actually needs, not the maximum the wrap can deliver.
Should You Keep the Thumb Loop On While Lifting?
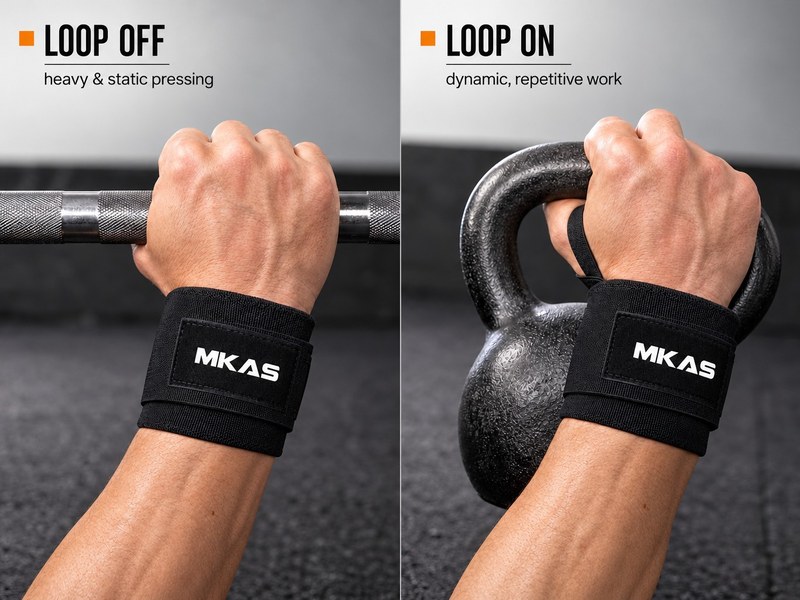
Most guides assume the loop stays on. From a manufacturing point of view, that is not what it was built for: the thumb loop is primarily an anchoring tool, used to hold the first turn while you wrap, not the load-bearing part of the finished wrap. Competition rules point the same way — the IPF technical rulebook specifies that the securing loop must not be over the thumb or fingers during the actual lift, alongside limits of 1 m length and 8 cm width.
In practice that gives two valid habits. For heavy bench press, powerlifting and heavy overhead work, remove the loop after wrapping: the thumb moves freely, nothing pulls against it under load, the grip feels cleaner and the loop stitching takes far less stress. For CrossFit, kettlebell work, gymnastics-style training and dynamic light-to-medium loads, keeping it on holds the wrap anchored through repeated movement and reduces shifting. Neither option is universally better — heavy and static favours removing it, dynamic and repetitive favours keeping it.
Bench Press vs. Overhead Press vs. CrossFit: One Reference Table
| Bench Press | Overhead Press | Weightlifting / CrossFit | |
|---|---|---|---|
| Wrist crease | Must cover | Cover | Cover |
| Palm-heel overlap | Slightly more | Less | Minimal |
| Tightness | Tight | Medium | Medium–loose |
| Wrist mobility left | Low | Medium | High |
| Thumb loop | Remove after wrapping | Optional | Keep on |
| Primary goal | Maximum support | Support + rotation | Support + mobility |
There is no single perfect wrist wrap setting for every lift. The table is the short version of everything above: static pressing buys support, dynamic work has to preserve movement.
Common Wrist Wrap Mistakes
| Common Wrapping Mistake | Why It Fails & Real Consequence |
|---|---|
| 1. Wearing them too high | Support sits on the forearm; feels tight but provides almost zero joint support. |
| 2. Covering too much of the palm | Awkward grip, skin rubbing and interference with bar contact. |
| 3. Wrapping too tight | Restricts circulation, causing numbness, swelling and deep marks after the set. |
| 4. Wrapping too loose | The wrap folds backward together with your wrist, so extension is never resisted. |
| 5. Using the same tension for every exercise | A bench-press setting hurts the catch position on a snatch or clean. |
| 6. Treating the thumb loop as a load strap | Loops are made for positioning; lateral loading tears them at the anchor point. |
The fixes follow the same order and take seconds. Re-anchor on the crease rather than the forearm, stop the lower edge at the palm heel, re-run the circulation and one-finger checks before loading, retighten if the wrap folds with your wrist under load, reset tension when you change movements, and slide the loop off once heavy pressing starts. If a wrap fails all these checks it is rarely a defective wrap — it is a wrapping habit.
Wrist Wraps vs. Lifting Straps
These two get confused constantly because both sit on the wrist and solve completely different problems. Wrist wraps provide joint stability: they stop the wrist folding backward under a pressing load. Lifting straps provide grip assistance: they connect your hand to the bar so your grip does not end the set on deadlifts, rows and pulls.
So if your wrist collapses on bench, you need wraps. If the bar slips out of your hands on deadlifts, you need gym lifting straps, and our complete guide to lifting straps for strength training covers styles and materials in detail. Plenty of serious lifters own both — just never expect one to do the other’s job in the same movement.
How Wrist Wrap Design Affects Fit and Support
Everything above has a product-design consequence. When a brand tells us what its customers lift, we can reverse-engineer the wrap instead of selling a catalogue item.
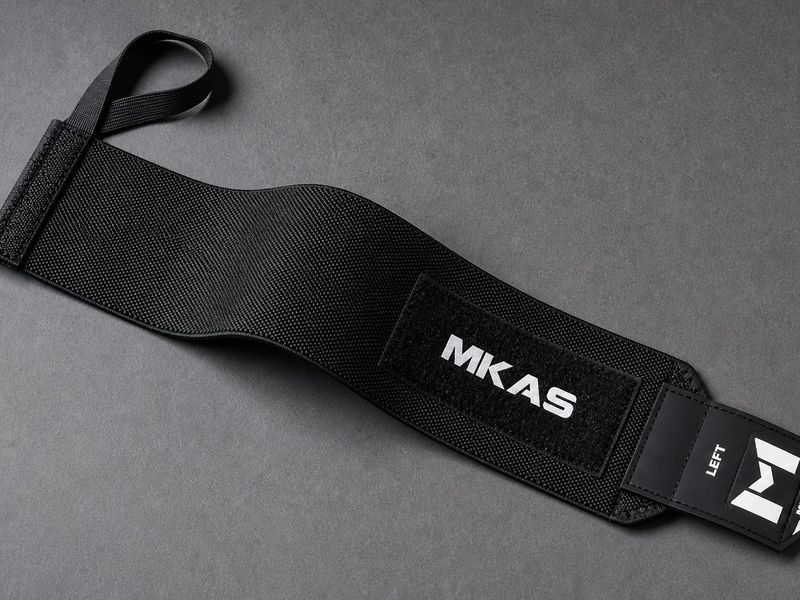
For maximum pressing support, the specification moves toward stiffer high-density elastic, a longer wrap so more turns land over the joint, and a stronger hook-and-loop closure that will not creep under tension. For CrossFit and dynamic training it moves the other way: more controlled elasticity, a softer edge finish so the palm heel does not get rubbed raw, and stitching that survives constant on-off cycles. When thumb loops keep tearing, the answer sits in the loop material, the reinforcement stitching and the attachment point — on our weightlifting wrist wraps that anchor point is triple-bartacked for exactly this reason, though no stitch pattern survives being used as a load strap.
What This Looks Like in a Real Order
The Three Complaints That Reach Us Most Often
Across the wrap programmes we run for brands, wholesalers and marketplace sellers, almost every forwarded review falls into one of three patterns — and each one has a specification answer rather than a usage excuse.
“The loop tore off.” This is the most frequent single complaint, and it is usually a dynamic-training customer using the loop as a load strap. The usage guidance in this article fixes half of it; the other half is built in, by moving to a higher-tenacity loop webbing and reinforcing the anchor point with a triple-bartack rather than a straight seam, so the failure point is no longer the first thing to give.
“It loosens halfway through the set.” Two different causes get reported with identical wording. Either the wrap is being anchored on the forearm instead of the wrist crease, or the hook-and-loop is creeping under tension. The first is a usage fix, the second is a closure decision — a longer and higher-engagement closure holds where a short patch slips. We spec hook-and-loop tested to 10,000+ fastening cycles under tension for exactly this reason.
“It went soft after a few months.” Elastic that loses recovery has a weave and density problem, not a wear-and-tear problem. Programme wraps run on competition-grade elastic that holds tension across 1,000+ stretch cycles, because a wrap that relaxes at month three produces a review that stays up for years.
The pattern behind all three is the same: what looks like a durability complaint is usually a wearing habit and a specification decision arriving together. That is why we ask what your customers actually lift before quoting — a CrossFit-heavy audience and a powerlifting audience need opposite answers on elasticity, edge finish and loop strategy, and getting that wrong shows up in reviews long before it shows up in reorders.
The way a wrap is worn and the way it is built are two halves of the same question. A lifter who understands the first will immediately notice the second — and so will their customers.
FAQ
Where should wrist wraps sit — do they need to cover the wrist crease?
Yes. The crease is where extension happens, so the wrap must cross it and overlap slightly onto the palm heel. Coverage into the gripping area is too far.
How tight should wrist wraps be?
Tight enough to stop easy backward folding, loose enough to pass the circulation check, and roughly one finger of space under the edge. Two fingers is usually too loose for heavy pressing.
Should I take the thumb loop off after wrapping?
For heavy static lifts, yes — and competition rules require the loop to be off the thumb during the lift. For dynamic training, keeping it on helps hold the wrap in place.
Can I wear the same wrist wraps for CrossFit and powerlifting?
You can, but adjust position, tightness and thumb-loop use for each. A medium-stiffness wrap is the most versatile compromise if you only want one pair.
Can wrist wraps be customized for my brand and market?
Yes. Elastic density, support level, width, length, colour, logo, edge finish, closure strength and retail packaging are all OEM/ODM variables, and sample orders are available before bulk production so you can confirm stiffness and finish first.
What should a buyer specify to keep wraps competition-legal?
Federation-legal wraps have to meet dimensional limits — 1 m maximum length and 8 cm maximum width under IPF rules, with any sleeves or securing tabs counted inside that length — and only wraps from manufacturers registered with the technical committee appear on the IPF approved equipment list. If your market includes competitive lifters, confirm both the dimensions and the approval route at the sampling stage.
Conclusion
Wearing wrist wraps correctly comes down to three decisions: anchor them on the wrist crease, set tension by how static and heavy the lift is, and treat the thumb loop as an anchoring tool rather than a load strap. Get those right and the same pair covers bench press, overhead press and dynamic work — get them wrong and the wrap either does nothing or cuts off circulation while doing it.
For brands and sellers, those three decisions are also a returns problem. Wraps sitting too high, loops tearing and elastic losing tension arrive first as a product review and second as a refund, and every one of them traces back to a specification choice: elastic density, wrap length, closure strength, edge finish, loop reinforcement. The next step is to match the specification to what your customers actually lift.
Build Wrist Wraps Your Customers Wear Correctly
MKAS manufactures competition-grade wrist wraps for brands, wholesalers and e-commerce sellers, with full OEM/ODM control over elastic density, wrap length, closure strength, edge finish and thumb-loop reinforcement. Tell us who your customers are and what they lift, and we will recommend a specification instead of a catalogue item.
Want to see how we build it? Learn more about the MKAS factory, or explore more guides on the MKAS blog.